
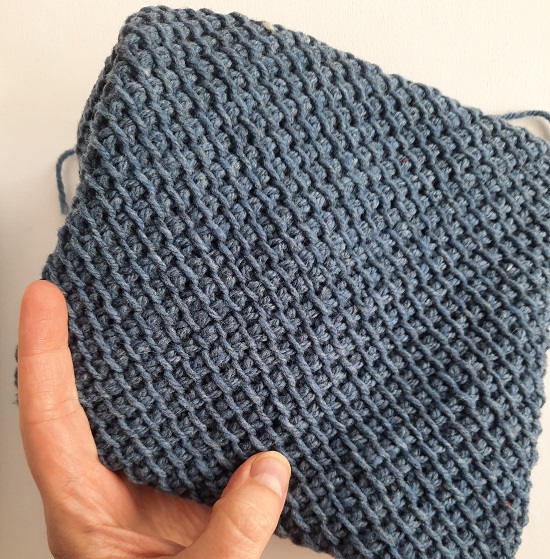
Find out how to make a seam along the final row of a Tunisian crochet project. This seam is almost invisible when used in a project made with the Tunisian simple stitch.
In the photo tutorial and the video I have used a white yarn to make the seam. No need to use a different yarn. Keep the same thread as for the rest of your work. The white yarn here is just to highlight the contrast with the final row made with the blue yarn.
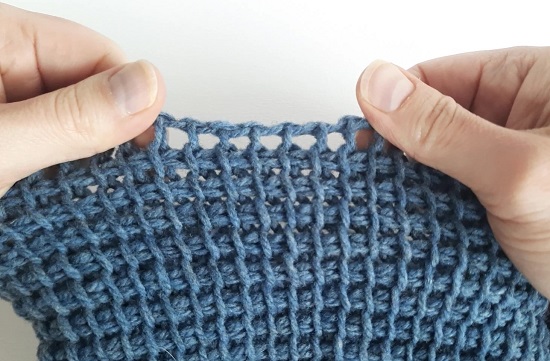
Final row in Tunisian crochet
This seam is made along the final row in Tunisian crochet after a return pass. In other words, you don’t make a “bind off” row in single crochet or slip stitches. You stop making stitches after the last return pass.
Whether your work flat or in the round, in any case, place the parts you want to seam together “back to back“. The front sides are visible on the outside. The back sides are inside.
You want to seam 2 parts together: one that is facing you and one that is on the opposite side. Don’t hesitate to lean your work towards you to have a better view of the final row on the other side. You can also turn your work so that you have one part to seam on the left and the other one on the right. I personally prefer to keep my work in the same position as I would crochet it.
You will insert the needle under 2 stitches on one side, then under 2 stitches on the opposite side.
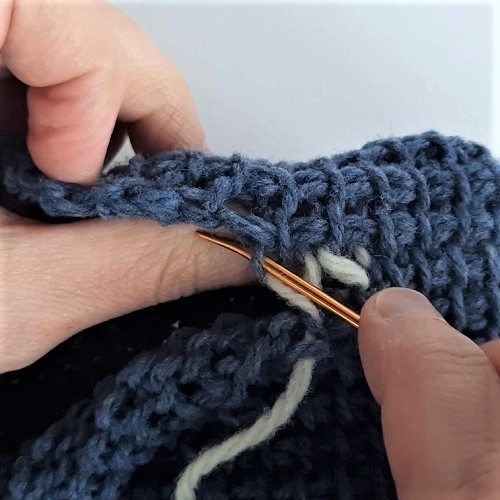
On the side facing you
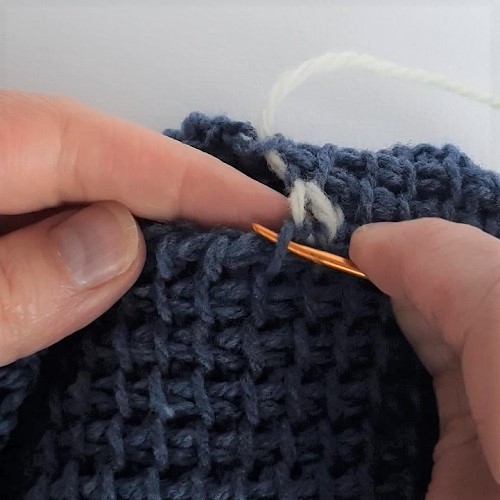
Start by inserting the needle under the front vertical bar. Note that the white yarn went through this stitch previously, as if it was twisted.
Then insert the needle under the next stitch, but from the opposite side. See how this second stitch is twisted. That’s a key element. Have a good look at the photo above.
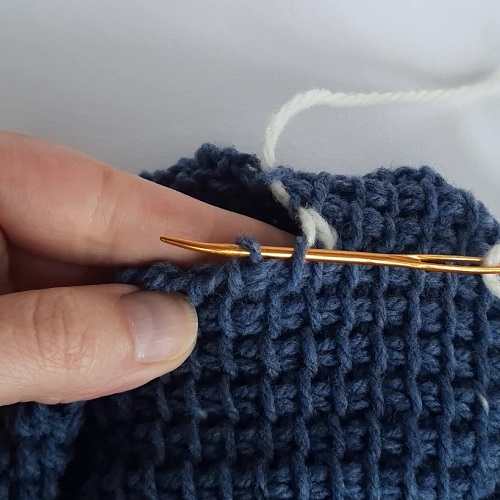
On the other side
Now look for the back vertical bar* of the stitch on the other part you want to seam. How you insert your needle is very important here. Note that the white yarn went through this stitch previously.
*Actually, I say back vertical bar to keep it simple. But technically it’s the front vertical bar. To be very specific, it’s the curved part of the front vertical bar just before it dives into the return pass chain. The idea is to twist this front vertical bar.
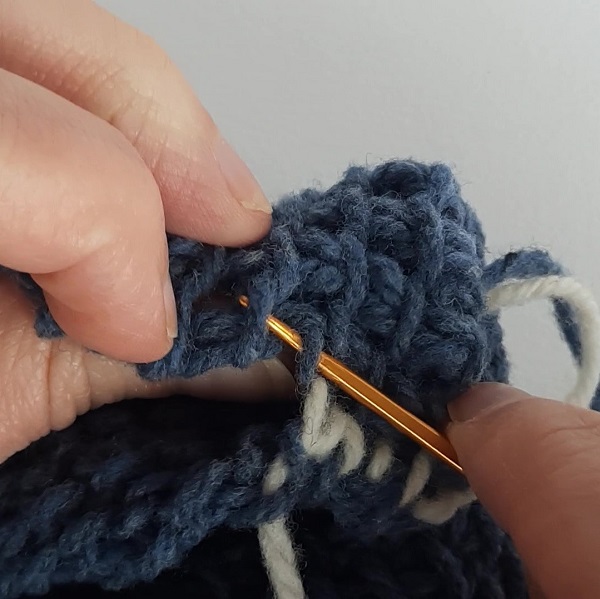
For the second stitch, it’s easy: you insert the needle under the front vertical bar of the next stitch.
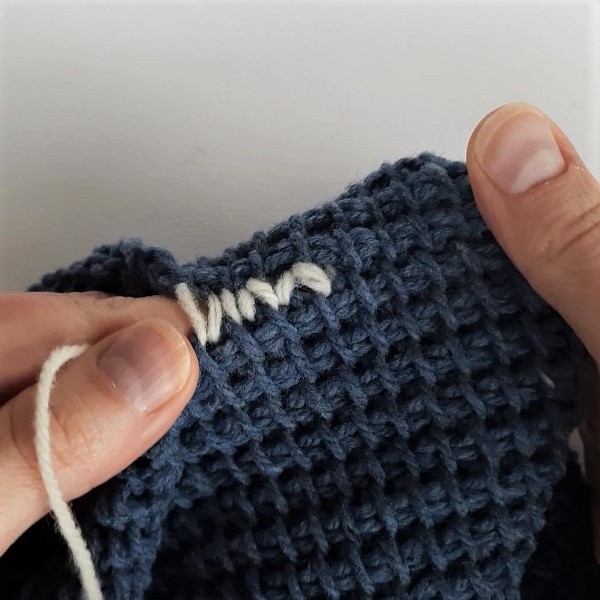
After a few stitches
Repeat these 2 steps: needle under 2 stitches on the front side, then needle under 2 stitches on the other side. Important note: on each side, the first stitch in which you insert your needle is always the second stitch under which you worked previously.
Keep this in mind as well: 1) You “twist” the second stitch when you make a seam in the front part facing you. 2) You “twist” the first stitch when you make a seam in the opposite part.
After a few stitches, gently pull on the working yarn to tighten the seam. If you plan to seam long rows, pull on the working yarn at relatively short regular intervals. Don’t wait the end of a long row to pull on the working yarn and tighten the seam. It is easier to adjust the tension along the way.
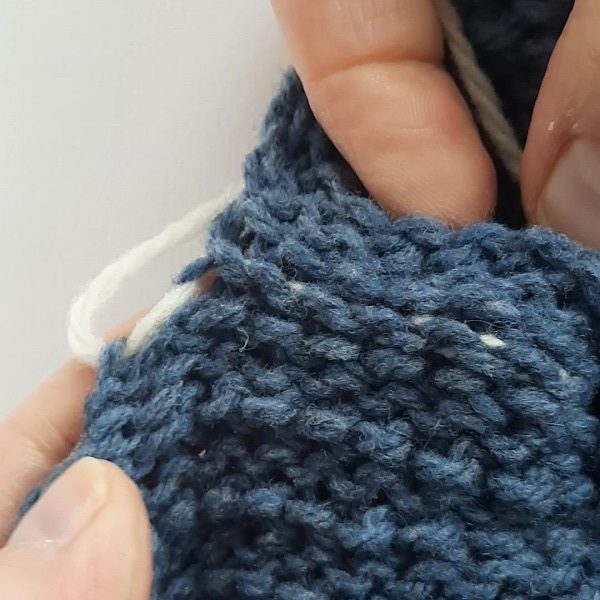
On the “private” side
The seam is invisible (or practically invisible) on the front (“public”) side. But it’s equally neat on the back (“private”) side. There is no big bulge.
Video
The photo tutorial here above is meant to share close-ups of key elements. And more specifically how stitches look like when you insert the needle. But I believe a video (in English) gives a better global view of the process. Both the photo tutorial and the video go together.
Thanks! It looks like the kitchner stitch that I use to close the toes of my knit socks. This is so smart!
As a beginner I love learning new stitches. You have a wonderful way of teaching that makes it very understandable. Thank you so much, from Texas…