
There are different types of connecting stitches in Tunisian crochet. The basic principle is always the same: you “connect” the end of a row to any other part of your project.
In this article, I show you how to make a simple connecting stitch that works well with the Tunisian simple stitch (hence the name “simple”). It allows you to join the end to the beginning of a row.
Kind reminder: English is not my mother tongue. I opted for “connecting stitch” but you can call it “joining stitch” or anything else. As you wish.
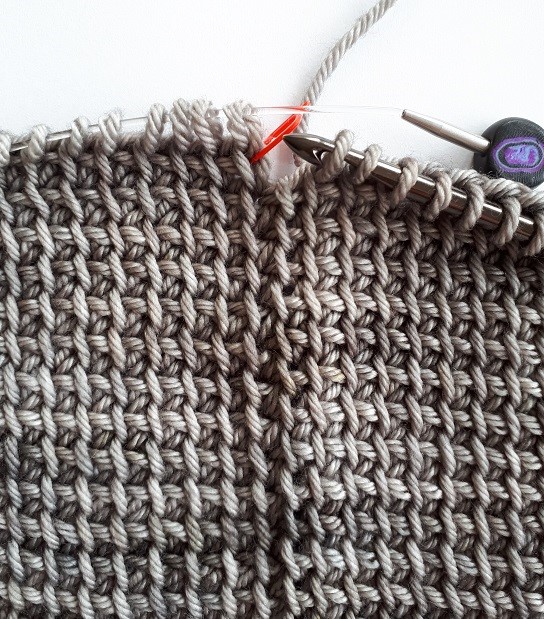
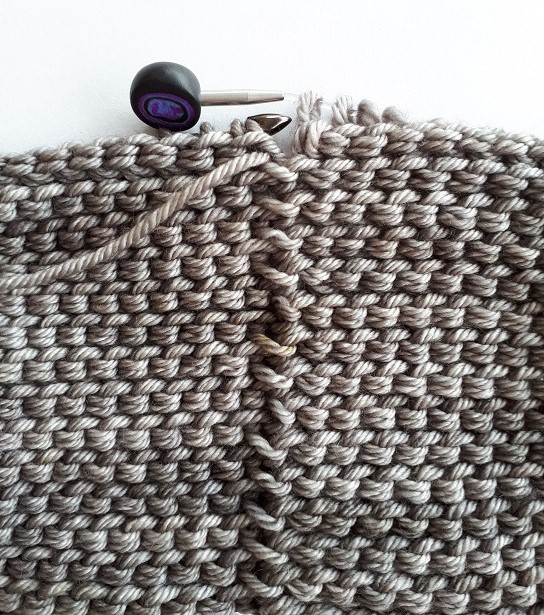
Place a marker at the end of the return pass
To easily see where to insert your hook to make a simple connecting stitch, I strongly recommend the use of a stitch marker. After some time, you’ll manage to easily see where to insert your hook to make a simple connecting stitch, but in the meantime, do use a stitch marker. It helps.
Before you start a forward pass, place a stitch marker in the back vertical bar of the edge stitch AND in the final return pass chain.

It is very important to place the marker at the back of the edge. Here below, in green, you see the back vertical bar of the edge stitch at the beginning of the row. The final return pass chain is painted in orange.
Then you make a “standard” forward pass in Tunisian simple stitch. Note: this “simple” connecting stitch works best with simple stitches or any stitch combination that includes simple stitches. Hence the name “simple connecting stitch”.
End of the forward pass
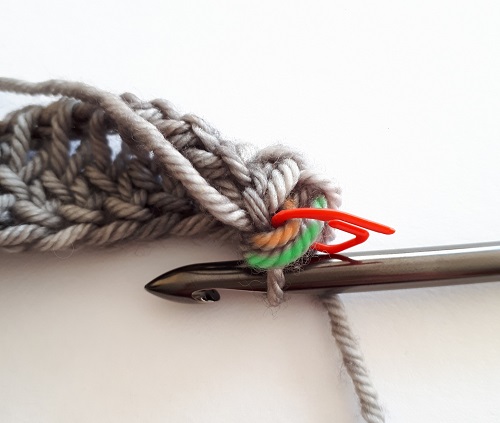
You make a connecting stitch when you no longer have stitches to pick up at the end of the forward pass. The idea, here, is to join the end of the forward pass to the beginning of that same row.
Insert your hook under the 2 threads of yarn identified by the marker.
Have a good look at the 3 loops on the hook. In yellow, you see the final loop you picked up when you made the last Tunisian simple stitch of the forward pass. In green and orange, you have the 2 loops where you placed your marker in the edge at the start of the row.
Yarn over and pull yarn through these 3 loops (orange, green and yellow).

Here you go. This is a simple connecting stitch.
Now, something important to keep in mind, this simple connecting stitch “replaces” the chain that you may make at the start of the return pass. In other words, as from now, you close all the loops on your hook with a “yarn over, pull through 2”. Don’t make any starting chain.
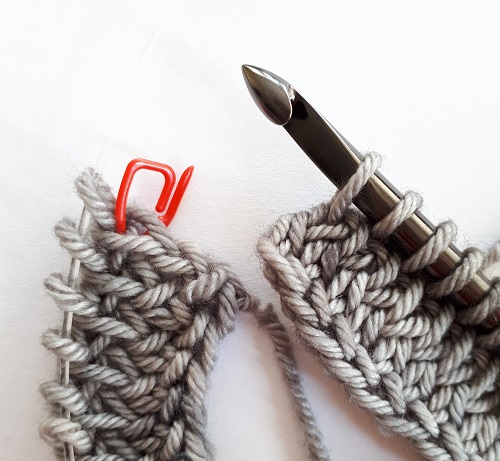
What about the back side?
In case you wonder what it looks like on the back side of work… here it is!
The simple connecting stitch in video
So far, I have made videos mostly in French. Guess what!? I dubbed the video about the simple connecting stitch in English.
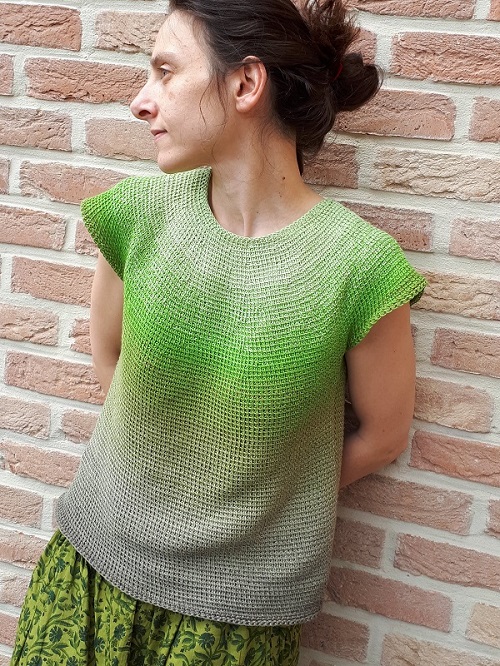
For the recording of this video, I used a project for a beanie to show the simple connecting stitch. But you can make other types of projects, like a top down. I used the simple connecting stitch technique in my pattern Céleste.
“In the round” or “flat”
The simple connecting stitch allows you to “close” a row by joining both ends of this row together. So it’s easy to jump on the conclusion that you work “in the round”. Yet, technically, in my humble opinion, you work “flat”. You make forward and return passes with a single-ended hook, just like when you work “flat”. You never turn your work. The only difference is that you join both ends. So it’s more a “join as you go” technique than working “in the round”. The simple connecting stitch allows you to avoid seaming both edges together.
Go beyond this concept of “in the round” and think about the option of using the simple connecting stitch in works made “flat”. Here below I show you a sample I made in 2 different colors. I started with a series of rows (forward and return passes, so “flat”) with a grey yarn. Then I made a series of rows with a blue yarn (again, “flat”). But to avoid seaming both pieces together, I made a simple connecting stitch at the end of my blue piece, to “connect”, join it to the grey piece.
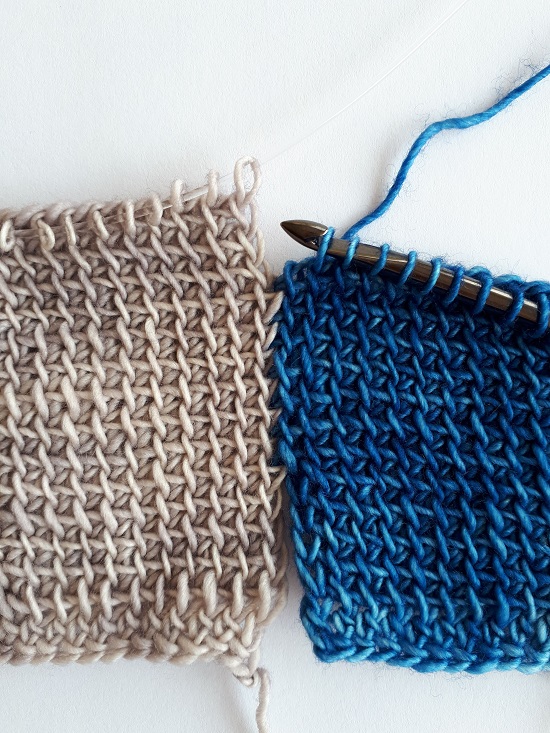
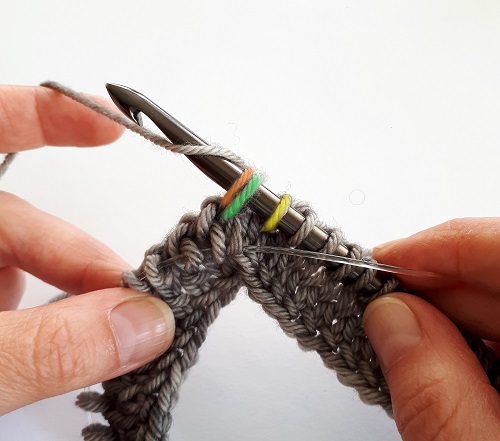
The most difficult part, here, is to spot the 2 strands of yarn at the back of the edge.
Stitch patterns
I mentioned it at the very beginning of this article: there are different types of connecting stitches. Keep in mind that the simple connecting stitch works well with the Tunisian simple stitch or any stitch pattern that includes a Tunisian simple stitch.
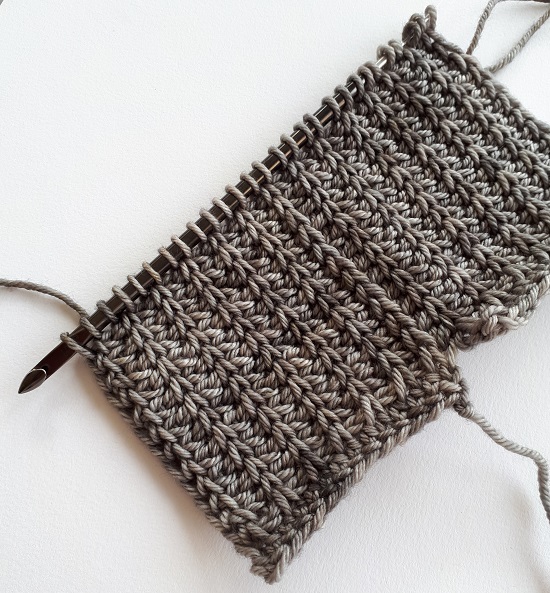
Example: the Tunisian rib stitch.
I use the simple connecting stitch in my pattern Au jour le jour.
