
A “full” row in Tunisian crochet is made of 2 parts: a forward pass and a return pass. This means that you can create short rows in Tunisian crochet by “shortening” either or both types of passes.
In this article I give you details about short return passes only. See my other article to find out more about short forward passes.
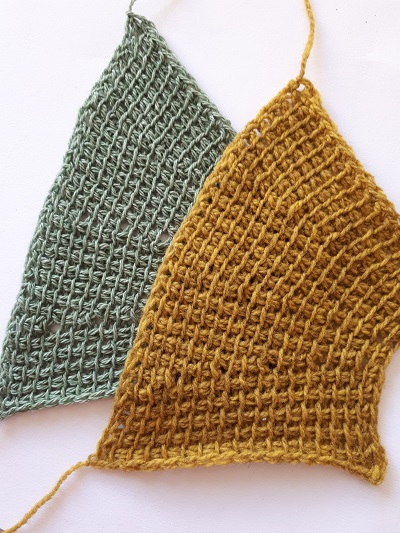
Yarn type matters!
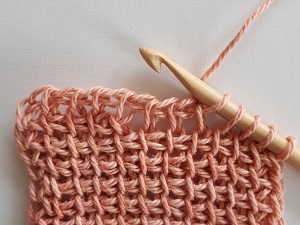
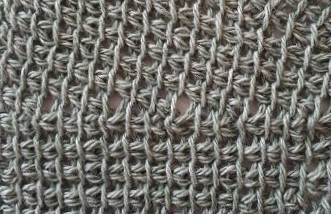
I made 2 samples in Tunisian simple stitches to illustrate this blog article. They are identical. The only difference is the type of yarn used. I used wool (100%) and a thinner yarn made of wool and cotton. I only share the photos of the sample made in thinner yarn because they show more details. But keep in mind that the stitch definition varies a lot depending on the type of yarn you use for your project. So don’t discard a technique simply because you find it does not give good results. Try it with a different yarn in another project.
What is a short return pass?
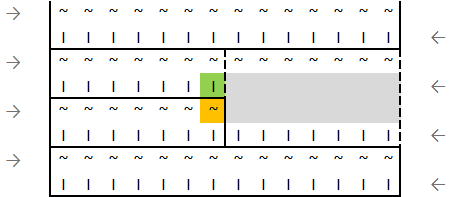
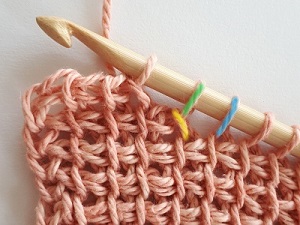
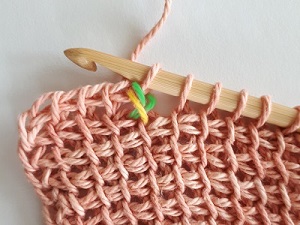
A short return pass is “just” an incomplete return pass on which you do not close all the loops picked up on the forward pass. You close a given number of loops (yellow) but then you stop and start a new forward pass even though you still have several loops (blue) left on your hook.
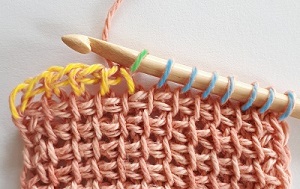
Important: Pay attention to the green loop on the photo above! Imagine you keep closing loops on the return pass, this green loop forms a return pass chain in between 2 stitches (last yellow and first blue). But if you stop the return pass here (to make a short return pass), this green loop becomes the first stitch of the new forward pass.
Gap between the short return pass and the loops left on hook
In the different ways to make short return passes described in this article, it’s not really how to make the return pass itself that changes. Actually, it’s what you do after the short return pass, when you make a new return pass that is longer than the previous short row. In other words, what matters is how you deal with the gap between the short return pass and the loops left on hook.
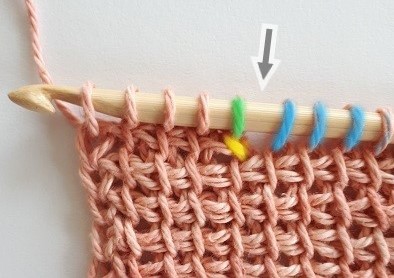
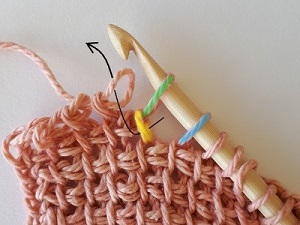
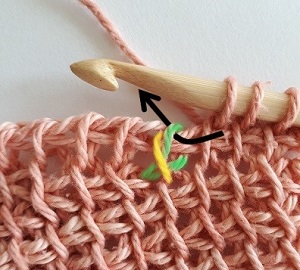
When you have done the short return pass, simply start a new forward pass by picking loops in the short row stitches. The first loop of this new forward pass is colored in green on the below photo. On the right you still have the loops picked up on the previous forward pass (in blue). The arrow indicates the gap between the short row and the loops that have not been closed in the previous (short) return pass. It is important to spot this part when you crochet short rows in Tunisian crochet.
You have several options to deal with this gap. I show you 2 methods: either you simply close loops “normally” (yarn over and pull through 2), or you cross 2 stitches over 2 rows.
Simple method: yarn over, pull through 2
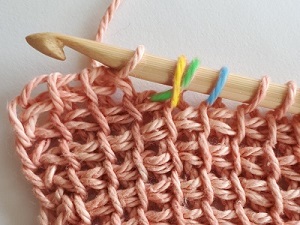
When your return pass is longer than the previous short return pass, you simply ignore the gap and keep on closing loops with a standard “yarn over, pull through 2”. On the following forward pass, you pick up loops in each stitch (the front vertical bar if you work in Tunisian simple stitch).
It’s simple and easy. The problem is that, with some yarn types, it creates a hole. It’s not really a problem. After all, these holes can be interesting design elements. But if you want something discreet, that’s not it.

Other option: cross 2 stitches over 2 rows
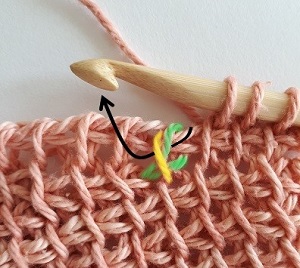
While making the following return pass, you can cross the first loop of the new forward pass (green) with the last stitch of the short row just below (yellow). It’s a tricky step that requires attention. I highly recommend that you place a stitch marker in the loop that is on your hook when you end your short return pass, the loop that becomes the first loop of the new forward pass (the one in green).
Identify the last stitch of your short return pass (yellow) and the other loops that have not been closed yet (green, blue and following).
Remove your hook from the active loop (pink), insert it under the first stitch of the short row below (yellow), then insert your hook back in the active loop.
You have crossed 2 stitches (yellow and green) that are aligned vertically and belong to 2 different rows.
Once you have crossed the 2 stitches, yarn over and pull yarn through 3 loops: pink, green and yellow. The rest of the return pass is “standard” (yarn over, pull through 2).
Now the big step is how to pick up a loop in these crossed stitches on the following forward pass. Depending on the type of stitch you use, it will be different. Here I share 2 possibilities: either we pick up a loop under 1 stitch only or under both crossed stitches at the same time.
Pick up a loop under only 1 or both crossed stitches
Option 1: On the next forward pass, you pick up a loop by inserting your hook under 1 stitch only, i.e. the first loop of the previous forward pass (the one in green).
Option 2: On the next forward pass, you pick up a loop by inserting your hook under both stitches. That’s the method I personally prefer.

Conclusion
The short rows presented in this article are only “shortened” on the return pass. You close less loops than you have picked up on the previous forward pass.
I posted a short video (in French) on my YouTube channel. It illustrates the different methods presented in the photo tutorial of this article.
Short rows can be made both on the FwdP and the RetP at the same time. You can combine both types of short rows in Tunisian crochet depending on the shape you want to get. But you can easily loose track of which row starts and ends where… So I strongly encourage you to use markers in the first and final stitches of your short rows. They help you to see how many stitches you need to pick up after the end of a short FwdP. And you easily see how many loops you need to close after the end of a short RetP.