
In this article, I show you 2 different ways to make a Tunisian purl simple stitch. With photos and a video (in French).
The first technique is rather conventional: you pull up a loop with a yarn over. I prefer the second technique (because I find it faster): you pull up a loop with a yarn under.

The question is: which one do you prefer?
Tunisian purl simple stitch
A quick reminder: there is not one but several Tunisian purl stitches. Any basic stitch in Tunisian crochet is “purled” when you bring yarn in front of your work before you actually insert your hook into your piece of work. You’ll find more details on different Tunisian purl stitches in the part I dedicate to “variations on basic Tunisian stitches”.
In this article, you’ll find 2 ways to make the Tunisian purl simple stitch. It’s the most common (popular?) purl stitch. It is often called the “Tunisian purl stitch” without any reference to the fact that it is a Tunisian simple stitch.
Step 1: yarn to the front
Because you want to make a purl stitch, before you insert your hook anywhere in your work, first bring the working yarn to the front.
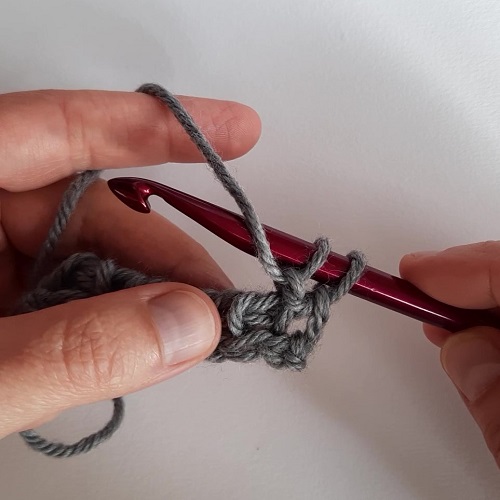
If the working yarn is at the back of your work (and hook), simply move it towards you, under the hook.
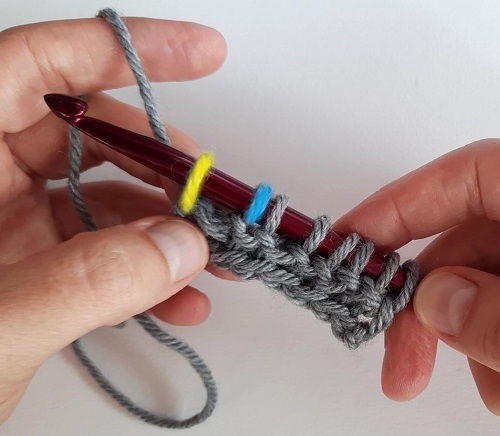
Step 2 : front vertical bar
So you hold the working yarn in front of your work. Then you insert your hook under the front vertical bar, just like you would to make a Tunisian simple stitch. Actually you make a Tunisian simple stitch. It is “purled” because the working yarn is in front, that’s all.
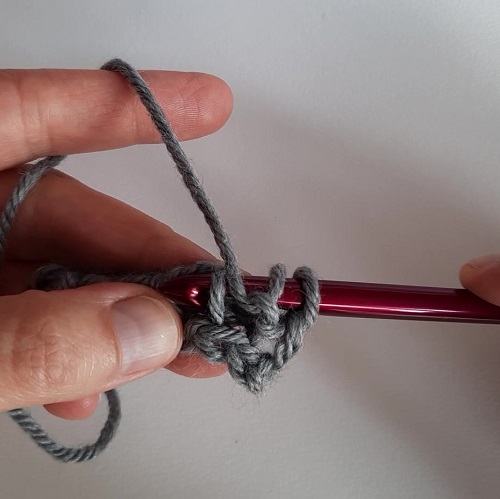
I think it’s the trickiest part in the execution of any Tunisian purl stitch. Indeed, the working yarn held in front does make it easy to see where and how to insert the hook into the work. But with a bit of practice, it gets easier.
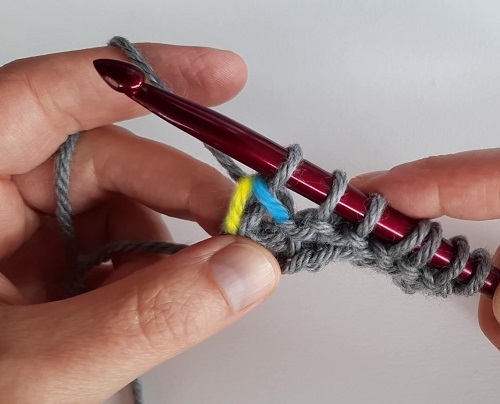
Step 3: yarn to the back
Next, before you make a yarn over or a yarn under, move the working yarn to the back of your work. It goes underneath the hook.
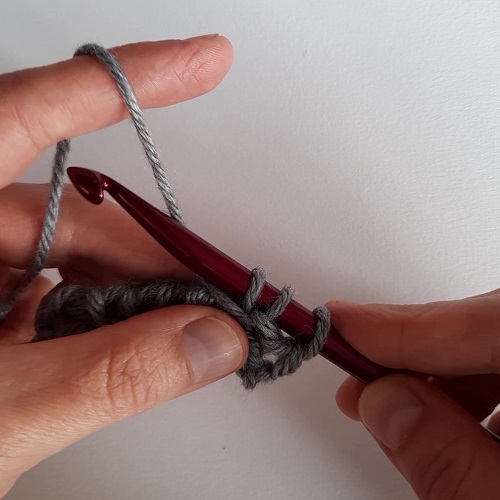
Note that the loop on your hook is the back vertical bar. The working yarn, first held in front, then moved to the back, forms some kind of “bump” in front of the vertical bar. This adds texture to the front of your work. It’s one of the different ways to fight against curling. You can start and end your work with a few rows in Tunisian purl stitches to defeat curling.
Step 4: choose between yarn over and yarn under
With Tunisian purl simple stitches, there is no major visual difference whether you make a yarn over or a yarn under to pick up a loop. Have a look at these 2 swatches I made: same yarn, same hook. On the left, I used yarn overs. On the right, yarn unders.

Visually, there is no obvious difference. Yet it is important to mention a few details to take into account, all the same:
- Rows tend to be higher, taller with yarn overs. I’m under the impression that sometimes vertical bars are a wee bit more visible with yarn overs. But not always.
- The overall texture “feels” a bit more fluid with yarn overs.
This being said, it all depends on the tension you put in your crochet work. And the type of yarn as well. I believe that if you tend to crochet very tightly, chances are you purl simple stitches will be even tighter with yarn unders.
Last step: option “yarn over”
The “yarn over” option is the most common technique used to pick up a loop. It’s true for any stitch and that includes the Tunisian purl simple stitch.
Basically, you wrap yarn around your hook as shown in the photo above.
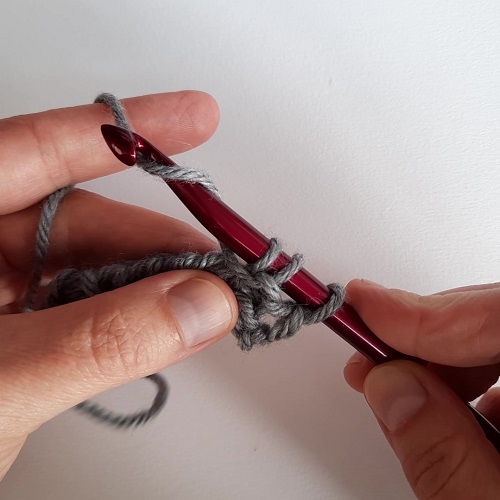
Last step: option “yarn under”
That’s the technique I personally prefer. Not saying I recommend it.
Let’s put it this way: have a close look at the position of the working yarn before you make any yarn over or under. The working yarn is under your hook. In the same position as for a yarn under. So basically you don’t have to wrap your yarn around the hook. With the hook head turned down, you simply grab the working yarn with the hook throat while moving the hook out from the front vertical bar.

I find this “yarn under” technique quicker to make. And I’m under the impression loops are more “regular” when made this way. It probably requires practice. But since visually there is no big difference, I opt for this technique because there is no additional movement to make with the working yarn to pull up a loop.
A short word about return passes
Usually return passes start with 1 chain. In other words, you make a yarn over and you pull yarn through 1 loop only. This being said, I prefer to skip this “chain 1” at the start of return passes when I make Tunisian purl stitches.
In video
Photo tutorials are great to show techniques step by step. But some may find it easier to see techniques “in motion”. So I made a short video (in French) to illustrate these 2 different techniques to make Tunisian purl simple stitches.
I insist: I don’t believe there is a right or wrong way to make Tunisian purl simple stitches. It is entirely up to you to choose which one you prefer. Give it a try and let me know in the comments below how you prefer to make your Tunisian purl simple stitches and why. Do you prefer yarn overs or yarn unders?
Merci beaucoup pour ces infos en textes, images, vidéos.
J’apprécie grandement votre enseignement.
Bonne continuation
Marie-Christine
Merci, Marie-Christine. J’essaie d’être aussi descriptive que possible.