
Edge stitches are the first and last stitches of a row and shape the right and left borders of a crocheted project. They are different from the other stitches within a row. Not only do they look different but also they are made in a different way. That’s particularly true in Tunisian crochet.
In this article, you’ll find 4 different edge stitches to make at the end of forward passes. The edge stitch at the start of forward passes will be presented in a future article.
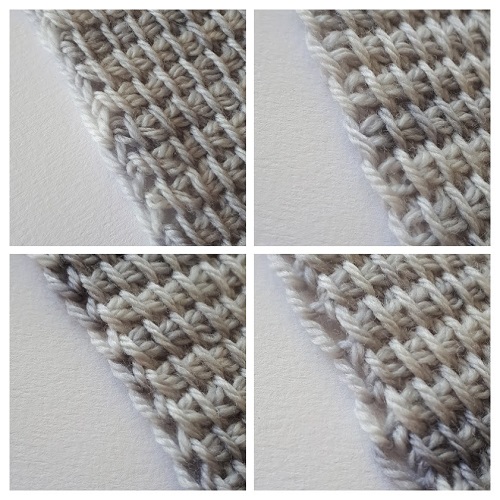
Notes on the samples of edge stitches
Here I show 4 different edge stitches. To easily compare them I made all samples in Tunisian simple stitches. To me this is the most basic stitch in Tunisian crochet. The most famous, typical stitch, I would say.
However, keep in mind that edge stitches will have a different visual effect depending on the stitches you make within a row. For example, twisted stitches or “high” stitches (like the Tunisian double crochet stitch) will change the look of edge stitches. So don’t stick to one unique edge stitch that you will use in all circumstances in your Tunisian crochet projects. If you don’t like how your edge look at the end of your forward passes, try different methods to pick up the final loop at the end of the forward passes.
Also the edge stitches described in this article do not include shaping. I discarded edges with increases and decreases on purpose. The idea is to compare 4 different ways to make edges at the end of forward passes.
Oh, and take the yarn type into account as well when working on your edges. Choose the edge stitches you prefer, whether because it’s easier to make with a given yarn type or it looks prettier. There is no rule, just a wide range of possibilities.
Basic principles for edges at the end of FwdP
Edge stitches presented here have 2 key elements to take into account:
- where you insert your hook when you pick up the final loop at the end of the FwdP: under 1 or 2 strands of yarn on the side of your work,
- how you start the return pass: with or without a starting chain.
It does not mean these are the only options available to make edge stitches. No, far from it. But it’s a good summary of 2 key parameters we can play with to create different edges.
Pick up a loop under 2 strands of yarn
The method I prefer is when a loop is picked up after inserting the hook under 2 strands of yarn on the side of the work. Why? Because this creates a more stable edge. Think about all the tensions and tractions your project will go through once finished: you will wash it, pull it, stretch it, wear it… A stable edge is like a good frame to keep the shape of your project the way you want it.
These 2 strands of yarn on the side are not easy to spot at first. They are on the side of your work, so turn the edge slightly towards you to see these 2 strands more easily.
Once you have picked up a loop under these 2 strands of yarn, you can start the return pass with a chain stitch. Simply yarn over and pull yarn through the loop you have just picked up. The edge at the end of the forward pass will look like this:
Or you can choose to start the return pass WITHOUT this chain stitch: simply yarn over and pull yarn through 2 loops, i.e. through the loop you picked up under the 2 strands and the last Tunisian simple stitch.
The main visual difference lies in the fact that the edge stitch is closer to the last Tunisian simple stitch. Somehow the edge looks “narrower”. Downside of this method: These 2 final stitches are close to each other, so you could unintentionally skip one and decrease the end of your row by 1 stitch.
Pick up a loop under 1 strand of yarn only
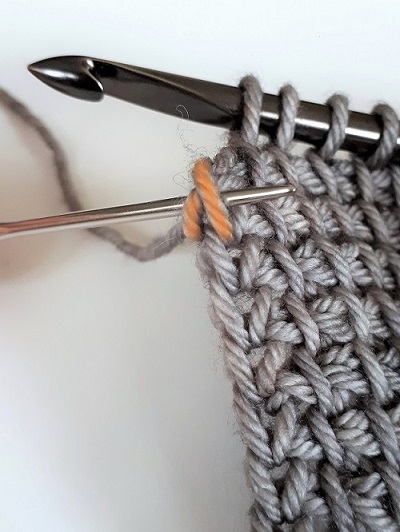
Other option: you pick up the final loop at the end of the forward pass by inserting your hook under one strand of yarn only. In the sample further below, this strand of yarn is the one visible on the front side of your work (in blue on the photo below).
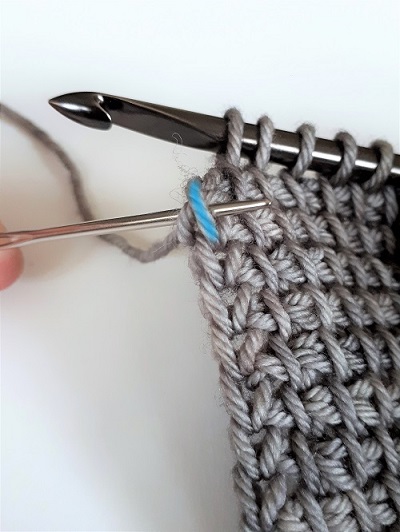
Personally I dislike this method, especially when used in a project all made of Tunisian simple stitches. But with other stitch patterns or increases or decreases, it can be very helpful and give interesting visual effects.
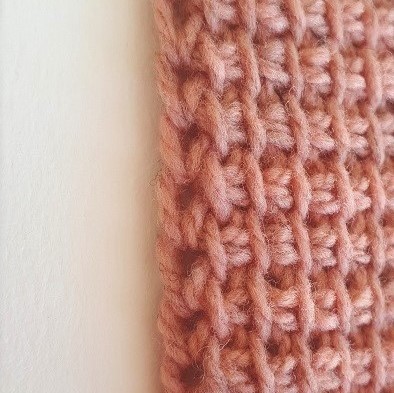
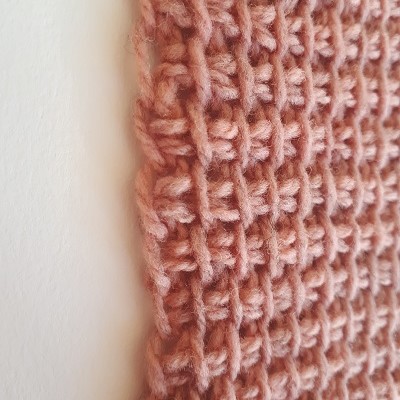
As in the previous method, once you have picked up your final loop, you can choose to start the return pass with a chain stitch. Your edge will look a lot like a Tunisian simple stitch.
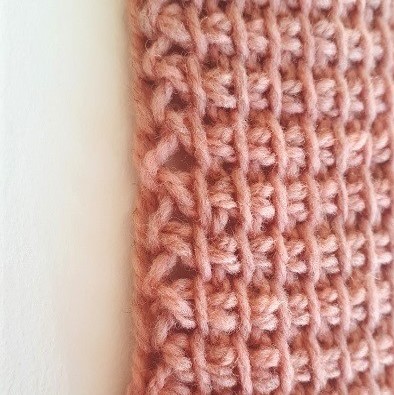
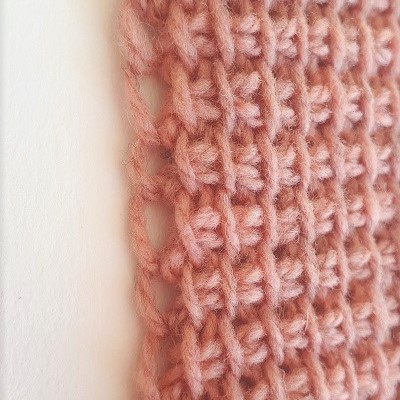
Or you start the return pass without a chain stitch. You simple yarn over and pull yarn through 2 loops. In this case the edge will have some kind of “holes” all along the border.
Edge stitches in video
I post videos (in French most of the time) on my YouTube channel to illustrate my blog articles. So here is the video I made about the 4 edge stitches described above.
G’day to you!
Thank you very much for the well thought out explanation and video tutorial 🙏
Even though I don’t understand the language, when watching it after reading the text, I managed to see what you meant.
Thank you, once again.
Thank you for your kind comment. Videos on my website are meant to be a visual support for my articles. So you do well to read the article first before watching the video. I’m happy it helps.