
Previously I had published an article about simple wet blocking for Tunisian crochet shawls. Today I’ll share key elements about blocking with wires and pins. It’s another blocking technique required for some Tunisian crochet projects, typically lace or items with a special shape.
Blocking boards
Before discussing wires and pins, I’d like to share a few words about blocking boards. I have used corked boards for a long time. When I bought them brand new, my corked tiles were flat and could be perfectly aligned. I liked that I could display these tiles to match the shape of my projects. But after repeatedly putting wet items on these corked tiles, they started to curl. They could no longer lay flat. This was causing bumps where tiles were aligned. Not great.
I thought I would invest in a foam blocking board, the kind of board that looks like jigsaw puzzle games. But they are very expensive. A similar but much cheaper system exists for children’s play mats. However, I had such a play mat a few years ago and I noticed that the colors would somewhat transfer to my kids’ clothes. A manufacturing defect probably. I got rid of these play mats and I don’t want to try these again.
I went to a Decathlon shop and I saw yoga mats. In different sizes, different materials. I first considered buying a thick fitness mat (15 mm), made of foam, heavy, that you roll when you want to move it away. A rather cumbersome equipment for a blocking board. So I kept looking at the different mats and I came across a light, rather thin yoga mat (9 mm), that you can fold, with some kind of plastic cover. I took 3 of them. Each mat is 160 cm long. It’s a little short to block a shawl.
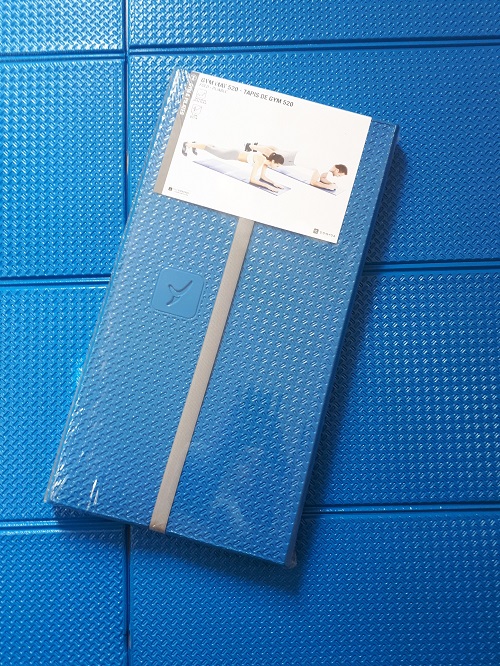
I was not sure 9 mm would be thick enough. Pins must remain in place. It turns out it’s thick enough. If I ever want something thicker, I can always place the yoga mats on a spare bed or on a living room carpet. Right now I don’t have any spare bed or carpet. But that’s an idea.
I would not pin a wet item directly on a bed or a carpet. When in contact with other textile fabrics, crocheted items take much longer to dry. I like that the yoga mats have a plastic cover that does not keep the item wet underneath.
About wires and pins
About wires, in the past, for some projects, I used the Tunisian crochet cables from the different sets I have. Thought they are a bit thick, they do the trick if you have enough of them. You can adapt the length to your needs by joining them together. Nice tip.
I also tried these transparent plastic wires used to display things in shop windows. They are available in DIY stores at a very cheap price. They exist in different diameters. Since they are usually sold in rolls, you can cut the exact length you need. They are flexible. Which is good and bad at the same time. They are easily adaptable to all sorts of round shapes. Good. But if you want a straight line, they will tend to bend a lot. It will not be that easy to keep them straight. For a rectangular shawl, that’s not ideal.
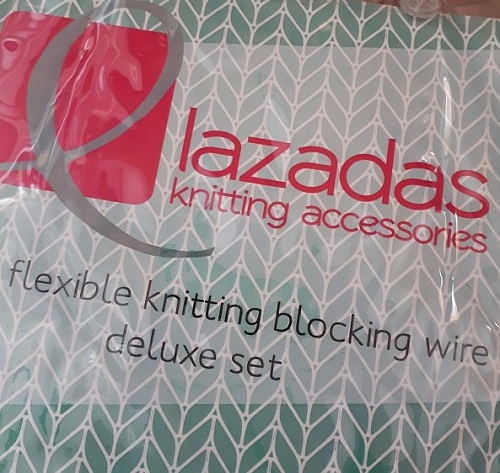
I recently invested in a set of knitting wires and pins from Lazadas. I use the word “invest” on purpose because this equipment is rather expensive. But since I make a lot of crocheted shawls, I thought it was time I started to use knitting wires and pins. I opted for the deluxe set. No less. It has 10 wires, 90 cm long each, 5 wires, 180 cm long each and 60 pins. A full set.
Serious blocking
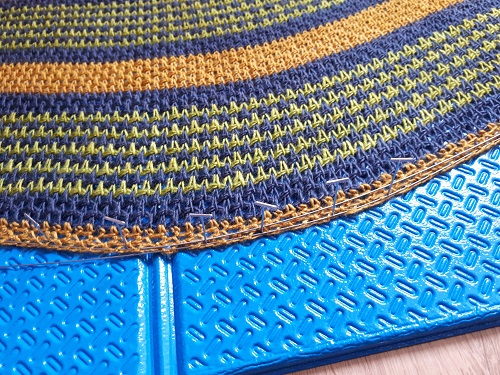
I’m using the words “serious blocking” as opposed to simple wet blocking. The first steps (soaking the item, then removing the excess of water) are the same. But the huge difference is that you use wires to stretch your crocheted project and give it the shape you want. Then the pins ensure the project keeps the shape when drying. Hence the need for a blocking board. A simple towel is not thick enough.
I tested the set from Lazadas and the yoga mats from Décathlon on 2 shawls I made this summer: Altaira (a design by Silke Reibeling) and Triskelion (a provisional name for one of my new designs the pattern of which will soon be in testing phase).
It may be obvious, but it’s worth saying it out loud: placing blocking wires and pins takes some time! In other words, it is not a quick step. You need to insert the wires in the edges of your shawl, one stitch or so at a time. Patience required! Then you stretch the project to give it the shape you like and you place pins at regular intervals. You may remove pins to place them in a better way or in different places. To give you an idea of the time it can take, I spent something like 1 hour to place each shawl on the yoga mat. With an audio book or podcast, it’s more fun.
Before / after blocking
For the shawl Altaira, before blocking, the lines where increases are placed are not stretched at all. So the top edge of the shawl is not straight. There is some curling (as very often in Tunisian crochet) in between the tips of the star. To note: I worked the last row in purl stitches to counter curling. Before blocking, the result is not striking. You would think it does not change anything. But combined with blocking it does help to defeat curling.
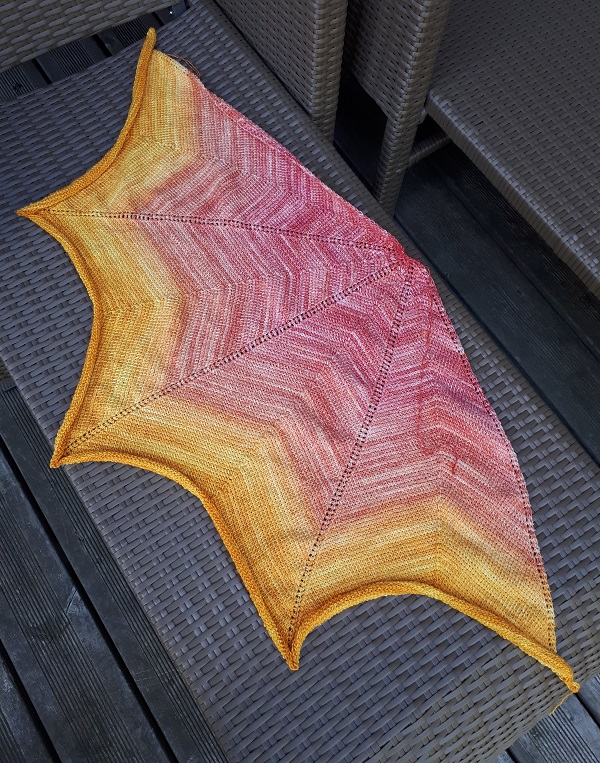
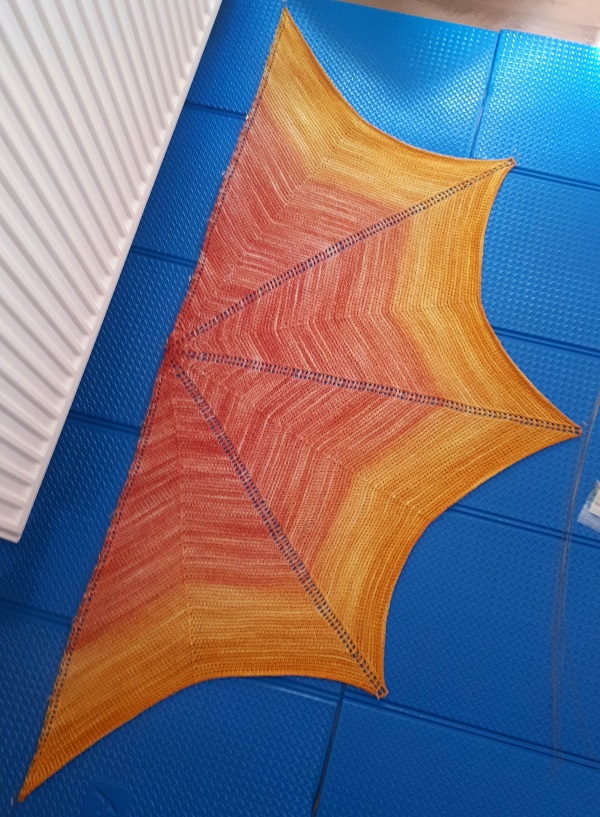
So for this shawl the objective was to get a straight top line and stretch the tips of the star. I only used one cable for the top edge. I placed pins with 10 to 15 cm in between each of them. Then I placed 2 pins at the end of each star tip. No pin in between. No curling left after blocking.
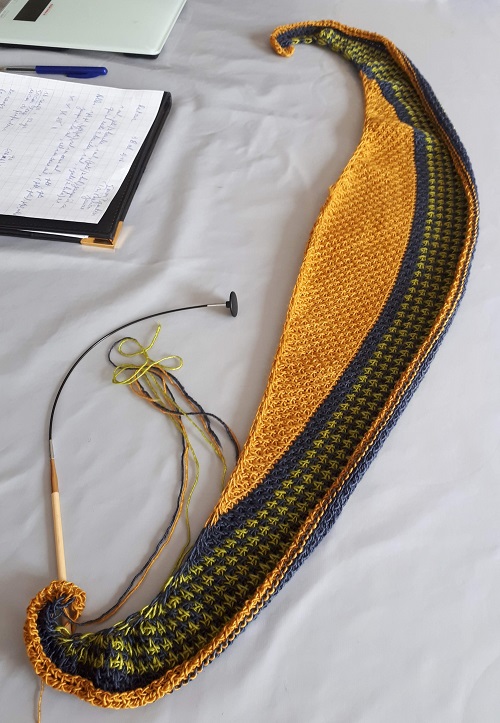
For Triskelion, before blocking, the shawl is very far from having the desired crescent shape. The construction forms a slight bump at the center of the top edge. And the pointy edges curl. Here I show you a photo of my work in progress. Before blocking, I’m far from the final crescent shape I plan to make.
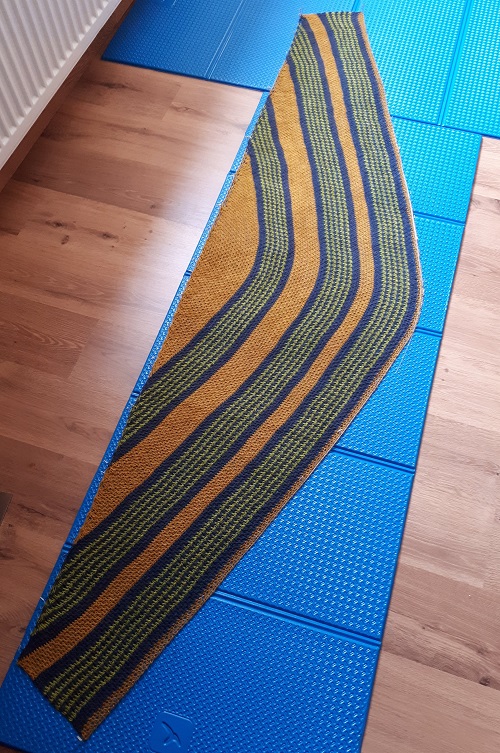
To reveal the crescent shape, the project has to be stretched in length first, in width afterwards. I first inserted a 180 cm wire in the top edge (just the right length, yeah), then I placed 2 90 cm wires to form a curve at the bottom edge. I placed pins, so that they were fairly close to each other (less than 10 cm or so). In fact, I used all 60 pins I had in the Lazadas set. I tell you: it took me 1 hour.
Don’t underestimate the importance of blocking
In short, “serious” blocking with wires and pins helps to considerably change the shape of a project. It also one of the different techniques to defeat curling. This blocking technique requires a bit of equipment, space and time, but in the end, results are worth the effort.
So what do you think about this “before/after blocking” presentation? Have you tried wires and pins to block your projects? Share your experience and thoughts in the comment section of this article.