
Blocking is a very important step in the making of a knitting or crochet project. The blocking techniques will be different depending on the type of fibre used in the project (wool, linen, cotton, synthetic yarn) and the type of project (blanket made of different squares, shawl, pullover, beanie), but in all cases blocking will help giving a nice finishing touch. Don’t underestimate the power of blocking.
In this article I present a very simple technique (I believe the most basic one) to block a project made of wool.
Before blocking
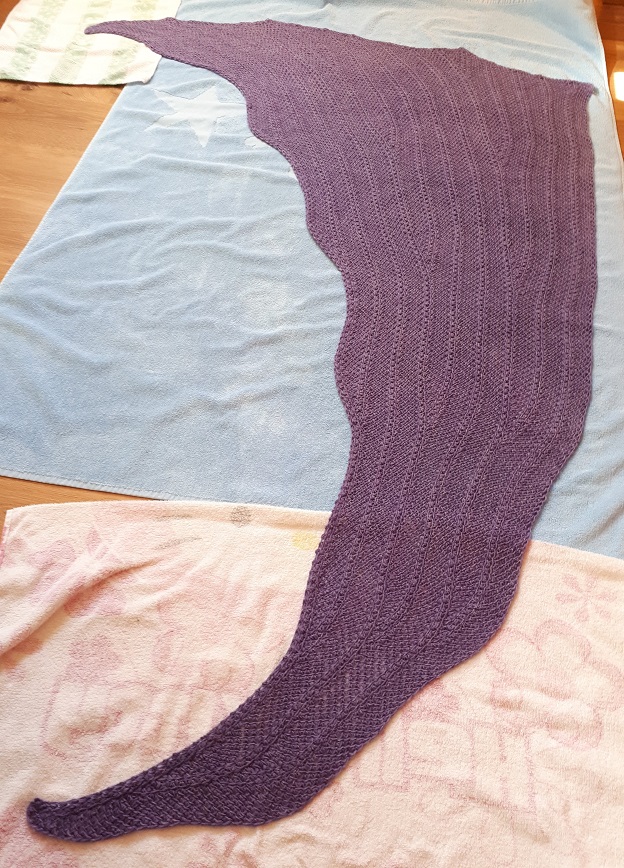
If you don’t believe blocking matters, then have a good look at the photo below. It’s my Tunisian crochet project For intérieur before blocking.
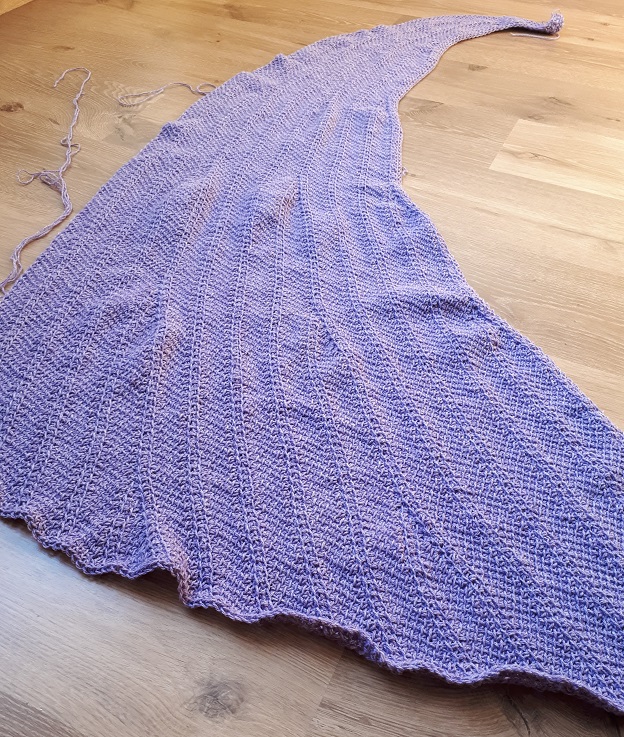
The shawl is not blocked and you clearly see bumps and irregularities here and there. It comes from the crocheting process that pulls and forces the yarn to twist to make stitches. Even if you try to crochet methodically and regularly, you’ll still get small imperfections. The project will not be completely neat.
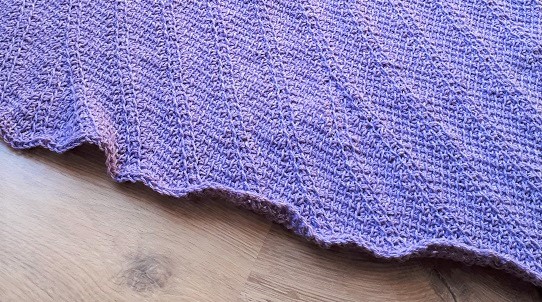
Note the curling effect on the edge. It’s inherent to the nature of Tunisian crochet. There are different ways to defeat curling : use a bigger hook than what is recommended on the yarn label, make a border, select a stretchy cast on technique, crochet stitches that will counteract the curling effect, and… block your project.
In short, once you have crocheted for hours and hours, you look at your project and you wonder : all this to get that? This is the step where blocking matters.
Blocking is simple
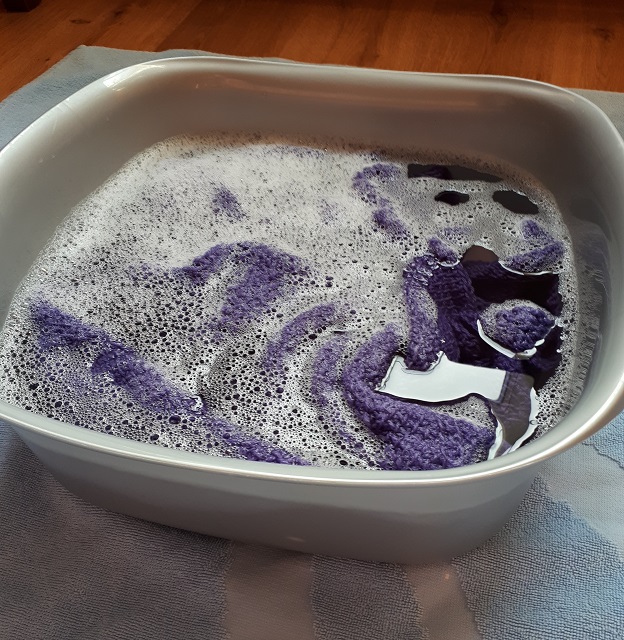
Blocking a project made of wool is about soaking the project in water, then lay it on a towel and give it the desired shape. As simple as that.
I use the word “soak” because you cannot say you wash your project. It’s not dirty, you do not plan to remove any dirt, you do not scrub it. What matters is to let water get deep into the fibre. Water should not be too warm or too cold. Wool does not react well to big sudden differences in temperature. So use lukewarm water, add a bit of wool wash (some do not require rinsing) and make sure it is evenly mixed with water. Then dip your project into it, press it gently to ensure it’s completely wet (no more small air bubbles coming to the water surface) and let it soak for fifteen minutes or so.
Then empty the bucket and press the project gently in your hands to get rid of as much water as you can. Warning: do not twist it! Be gentle and careful. Lay your project on a towel and roll it up (like a spring roll), then squeeze the towel with the project in it to get rid of the remaining excess of water. Unroll the wet towel, take your project and lay it on a dry towel. Or several dry towels (depending on the size of your project). And give it the shape you want. Stretch the fabric. Gently. Pull here and there to make it even. Gently. And let it dry.
You can use blocking mats, pins and cables to ensure your project is blocked with straight lines and does not shrink back while drying. From my personal experience, I use pins (rarely cables) for lace projects or shawls with a very specific shape. I’ll tell you about that in a future article. Here I want to show the basic, simple blocking process I use for projects that only require “light” blocking.
After blocking
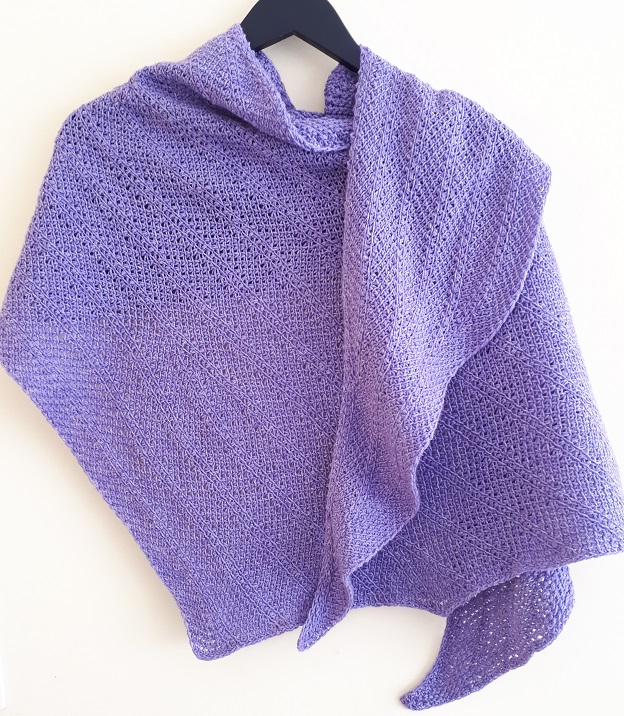
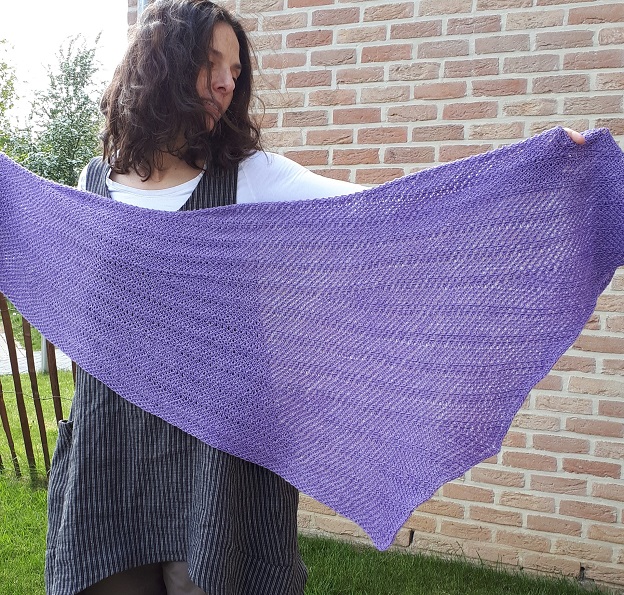
Once the project is completely dry, you can admire and enjoy it!
Ends to weave in – before or after blocking?
It’s open to debate. Personally I weave in ends before blocking. Wool swells during the soaking process and woven in ends are trapped in the project. The negative aspect is that once all ends are woven in and your project is blocked, if you want to undo (part of) your project, well, good luck! In other words, if you are not too sure you’ll keep your project as it is after blocking, don’t weave in ends yet.
To note, if you have made a project with lots of yarn ends to weave in and you block it before weaving in these many many ends, plan some time after blocking to untie all the loose ends. I did that once and I can tell it was not particularly funny.
Does this simple blocking work for all items?
Well, no. As mentioned in the beginning of this article, there are different techniques for blocking. It all depends on the type of fibre and the type of project. Here I’m showing that blocking can be something really simple and efficient in some cases. Give it a try. And don’t hesitate to share your experience in the comments section.